 This is an easy recipe to make Salted caramel at home. Salted caramel syrup is best with cakes, cup cakes, ice creams etc. It’s sweet, sticky, buttery, salted sugary goodness. It's so addictive taste that no one can resist. This is a very simple 4 ingredient recipe which is very easy to make. Ingredients 1. White Sugar - 1 cup 2. Butter - 5 tbsp 3. Heavy Cream - 1 cup 4. Salt - a pinch 5. Vanilla essence - 1 tsp (optional) Note: Keep all the ingredients ready and with your reach, because the sugar will burn very fast. Method 1. Caramelize white sugar on medium high heat for about 10 mins. Till it turns a dark color. 2. Sugar will form clumps and eventually melt into a thick brown, amber-colored liquid as you continue to stir. Be careful not to burn. 3. Once the sugar is completely dissolved and it starts to bubble. Reduce the heat and immediately add butter and be careful because it will bubble rapidly. 4. When the butter is completely dissolved. Slowly add heavy cream, it will bubble up. So be careful to add it slowly and don't panic. 5. Allow it to bubble for a few seconds. It will rise up in the pan. 6. Remove from the heat and stir in salt and vanilla essence. 7. Cool completely before using them. 
0 Comments
 Cream Cheese Frosting is a perfect balance between rich and light. It is very creamy and fluffy and not very sweet compared to buttercream frosting. It can be made in any flavor, here am making a caramel cream cheese frosting by adding caramel syrup in the base recipe. You can make different flavored cream cheese frosting like lime, orange, vanilla etc. Cream cheese frosting is best for carrot cake, red velvet cake, caramel cake etc,  Ingredients 1. Butter - 1/2 cup 2. Cream Cheese - 8 oz 3. Vanilla - 1 tsp 4. Powdered Sugar - 3 cups 5. Caramel Syrup - 1/8 cup Method 1. Cream butter and cream cheese in a bowl until smooth. 2. At this stage add the flavoring. Here am adding vanilla essence and caramel syrup. Mix until well combined. 3. Now add powdered sugar and combine until well incorporated. 4. Cream cheese frosting is ready.
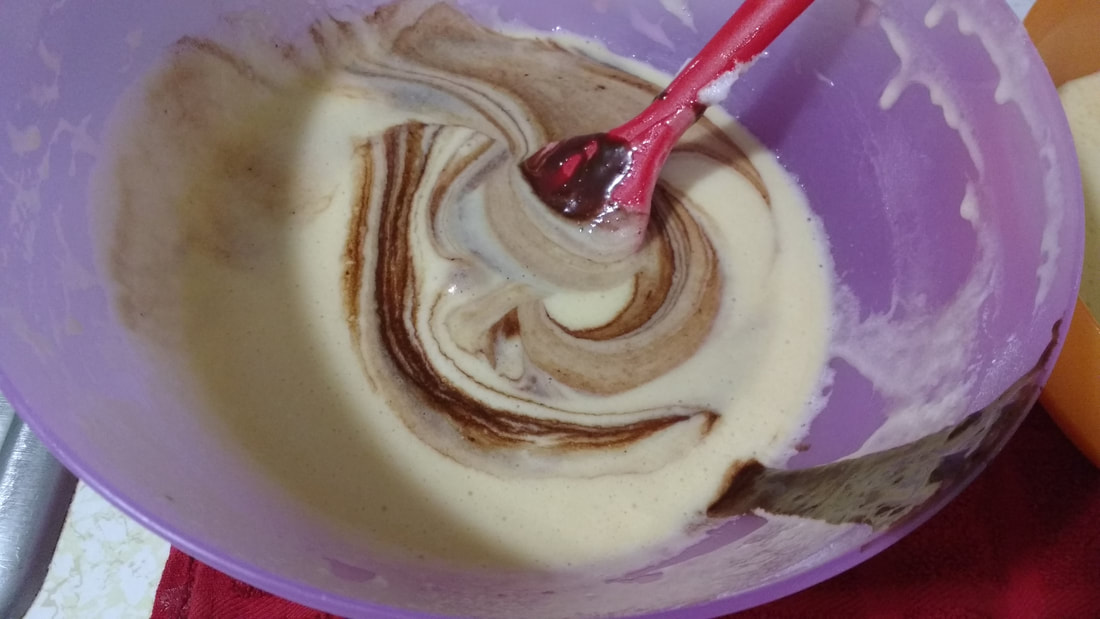
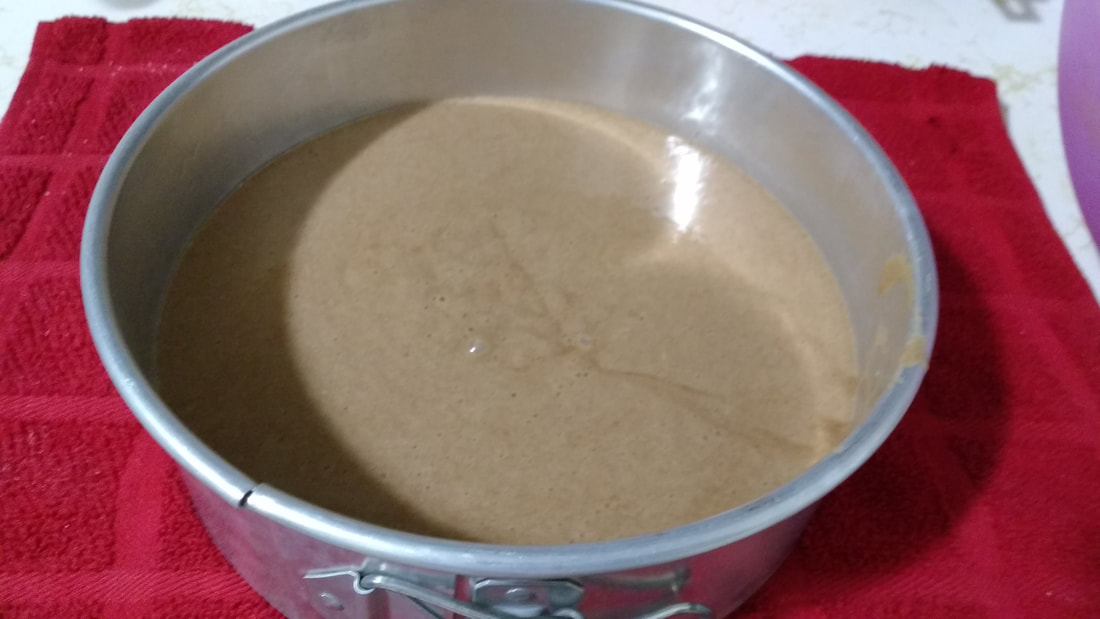
 Today morning I came to know that, it's my friend's wedding anniversary. Without a second thought. I wanted to make a salted caramel cake, which she likes the most among all the cakes which I have made and she was able to taste. Being my friend and neighbor, she has tasted most of my cakes. My usual salted caramel cake recipe has eggs in it. Since her in laws were home and they are strict vegetarians, I found this delicious egg less recipe. It is equally good to my usual recipe which I make with eggs. When the cakes were baked it was very soft and moist, She and her family really enjoyed this cake and she told it was equally good as my previous salted caramel cake. :-D happy me!! I made a 6 inch small cake sandwiched with cream cheese frosting and caramel sauce layer. So anyone looking for an Eggless salted caramel cake, this is the best recipe you can find. Ingredients for cake Serves - 10 pieces 1. Butter - 3 tbsp 2. Brown Sugar - 1/4 cup 3. Curd/ Yogurt - 1/8 cup 4. Caramel Syrup - 1/8 cup 5. Milk - 1/4 cup 6. Vanilla essence - 1/4 tsp 7. Flour/ Maida - 1/2 cup + 1/8 cup 8. Baking Powder - 1/2 tsp 9. Baking Soda - 1/4 tsp 10. Salt - 1/4 tsp Caramel Cream Cheese frosting Recipe: http://my192recipes.weebly.com/blog/caramel-cream-cheese-frosting Caramel Syrup Recipe: http://my192recipes.weebly.com/blog/salted-caramel-syrup Procedure 1. Preheat oven to 175 C/347 F. 2. In a bowl, cream butter and sugar, until light and fluffy. 3. Add Caramel syrup and curd into butter mixture and beat until incorporated. 4. The batter will look curdled, but it's fine. Add milk and mix well. 5. Mix together all the dry ingredients, flour, baking powder, baking soda and salt in a bowl. 6. Add the dry ingredients into butter mixture. Mix until well incorporated. 7. Pour into a greased 6 " pan. Bake for 30 - 40 mins at 347 F or until a skewer inserted in middle comes out clean. 8. Cool in the pan for few mins and then remove from pan and cool completely on a cooling rack. Assembling the Cake 1. Cut the cake into 2 equal halves, using a serrated knife or cake cutter. 2. Place the first layer over a plate/ cake board. Spread a layer of caramel syrup. 3. Over the caramel syrup, spread a layer of caramel cream cheese frosting. 4. Place the other layer of cake over the cream cheese frosting. 5. Cover the cake with frosting. Decorate according to your wish. 6. Cream cheese frosting piping works best when it is cold. Keep the piping bag filled with frosting in the fridge for 5 mins before you start working for best result.  After I started making bread at home, I have never bought a bread from the store unless in certain unavoidable situations. I have tried different variety of breads - whole wheat bread, Wheat and All purpose flour mixed bread, white bread etc.. Wheat breads tend to be more dense and heavy compared to white bread. But wheat bread is more healthy, I always like making new recipes and I found this one. This recipe is super healthy. It has no milk, butter, eggs and sugar. Instead it has Maple syrup for sweetness, grounded cumin, olive oil for fat, water and lemon juice. I was curious to try this and it came out really good. So I want you all to try this recipe if you are looking for a super healthy bread recipe. Ingredients Serves - loaf For Sponge 1. Whole Wheat flour - 1 cup 2. Warm Water - 1 cup 3. Maple Syrup/ sweetener of your choice - 2.5 tbsp 4. Active yeast - 1 tbsp Bread 1. Whole wheat flour - 2 cups 2. Salt - 1 tsp 3. Olive Oil - 2 tbsp 4. Lemon juice/ lime juice - 1 - 1.5 tsp 5. Grounded Cumin seeds - 1/4 tsp 6. Water - 2 tbsp 7. Olive Oil for brush as needed. Method 1. Mix all the ingredients listed in sponge in a large bowl (I used standing mixer bowl). Whisk until combined for about 2 - 3 mins or until the batter looks smooth. 2. The water should be warm (not too cold nor too hot) unless it will kill the yeast. You can test the water my dipping you finger in water and if you can feel its warm, and you can tolerate the heat then it is ready to use. 3. Now cover the bowl with towel or plastic wrap and place the sponge mixture in a warm place for about 1 hour. If your living in cool place, keep it in the oven with oven lights on for 1 hr. The lights will keep good enough temperature even during cold weather. You need a big bowl because the sponge will rise double its size. 4. After about 1 hour, the sponge is doubled in size. 5. In the stand mixer, add the sponge. Mix in the rest of the ingredients flour, cumin, salt, water and lime or lemon juice. 6. Knead the dough for 5 - 8 mins or until we get a soft smooth dough. The dough should not be very hard. When a small portion is pulled it should not break immediately. 7. Rest the dough for 20 mins in the mixing bowl. Resting will help to form the gluten. 8. After that I transferred by dough on to work station. Knead with hands to make smooth dough. I made double the recipe, so made it into 2 equal halves. 9. Now shape the dough to fit into 9 by 5 inch bread pan. Roll the dough and fold in the longest side. Seal by pinching. Place onto greased bread pan. 10. Spray or brush the top with water and sprinkle sesame seeds or oats. Cover with towel or plastic wrap and place in warm place until it doubled in size for about 1 hour. 10. Preheat the oven for 350 F. Bake bread for 40 mins. 11. Cool the bread within pan for few mins and then remove from pan. 12. Cool completely before slicing with serrated knife. 13. Store in a bread container on the counter for 2 days or refrigerate for 1 week.  If you bought oranges in bulk and bored eating in its real form, this is the perfect recipe for you. This is the best and easy recipe you can get. Most of the ingredients will be available in your own pantry and need very less utensils, that means less work. It tastes even better the next day. Orange flavor will be more prominent the next day. It needs to rest in order to enhance the flavor. So if you guys have leftover oranges so make this delicious cake and enjoy. Ingredients Serves - 1 loaf Dry Ingredient 1. Flour - 2 cups 2. Salt - 1/2 tsp 3. Baking Powder - 3 tsp 4. Superfine Sugar - 1 1/2 cups Wet Ingredients 5. Milk - 1/2 cup 6. Orange Juice - 1/2 cup 7. Vegetable oil - 1/2 cup 8. Eggs (room temp) - 3 beaten 9. Orange Zest - 1 1/2 tsp Method 1. Preheat oven to 350 F . Grease the pan with oil/butter. 2. In a measuring cup, add milk, orange juice, oil, beaten eggs and orange zest. 3. Sift together all dry ingredients except sugar. Then add the sugar and whisk everything together. 4. Pour the wet ingredients into dry ingredients and mix well. 5. Pour into the greased pan. Tap for any air bubbles. 6. Bake for 55 min - 1 hour at 350 F or until 'toothpick test'. 7. Let it cool on pan for 10 mins. Then take it out and cool in the cooling rack until completely cooled.
8. Cut, serve and enjoy the delicious orange keep. Happy baking!  Vancho Cake is chocolate and vanilla cake sandwiched with dark chocolate and white chocolate cream and covered with dark and white chocolate ganache. Both vanilla and chocolate cake lovers will love this cake. This is the best cake for birthdays. Kids will love it. You can make our favorite chocolate and vanilla cake and just sandwich them with any frosting (buttercream, fresh cream, ganache etc.) you like. Here I made a chocolate and vanilla chiffon cake. Chiffon cakes are a light and fluffy cake made with vegetable oil. I like using sponge cakes for layering because it will soak up more flavor than dense cakes. You can make any flavored sugar syrup to soak cakes, I made the lemon flavored sugar syrup. This is a bit time consuming, but it's worth doing it for a special day. There are several components like cakes, icing for sandwiching, ganache/glaze for covering cakes, sugar syrup, and decorations. Each of these should be made cooled etc. so yeah it's time taking. So start early and finish without any stress. Ingredients Vanilla Chiffon Cake 1. Egg Yolks - 7 2. Egg Whites - 7 3. Flour (All purpose flour/Maida) - 2 cups 4. Sugar - 1 1/2 cups 5. Vanilla extract - 2 tsp 6. Vegetable oil/ canola oil - 1/2 cup 7. Baking powder - 2 Tsp 8. Baking Soda - 1/4 Tsp 9. Cream of Tartar/ Lime juice - 1/2 Tsp 10. Water - 3/4 cup 11. Salt - 1 Tsp Chocolate Chiffon Cake All above-listed ingredients plus these 1. Unsweetened Chocolate - 2 ounce 2. Sugar - 1/4 cup ( avoid if using semi-sweet chocolate) 3. Hot water - 1/4 cup Method Vanilla Chiffon Cake 1. Eggs should be at room temp for about 30 mins. You can also put the eggs in slightly warm water. Do not put in very hot water and cook the eggs. 2. Preheat oven to 325 degrees Fahrenheit. 3. In a large bowl, mix together flour, sugar, baking powder, baking soda, and salt. Combine well until evenly distributed. 4. In another bowl, mix egg yolks, water, oil, and vanilla. Whisk together. 5. Mix this with the flour mixture and combine well. 6. In a standing mixer or using a hand mixer, whisk egg white with cream of tartar or lime juice until stiff peaks are formed. 7. Slowly fold in the egg whites into the egg yolk mixture. Do not over mix. The batter will increase in volume. Just use a spatula to mix. 8. Divide the batter into two equal portions. Use one portion to make chocolate chiffon cake. 9. Grease two 8 1/2 inch round cake pan (you can use 9-inch pan also) using oil & parchment paper. 10. Pour one portion of the cake batter equally into both pans to make vanilla chiffon. 11. Bake for 30 - 35 mins at 325 F or until a toothpick inserted in the center of the cake comes out clean. 12. Cool the cake on a cooling rack. Chocolate Chiffon Cake 1. Melt chocolate in a heavy bottom saucepan over low heat together with sugar (if using sweetened chocolate chips, no need to add sugar). 2. Then add Hot water and mix well until it reaches a sauce consistency. 3. Let it cool completely. 4. Mix the chocolate sauce into the other half of the cake batter to make a chocolate chiffon cake. 5. Pour the batter into one 8 1/2 inch baking pan. (I am making in one pan and later will cut into 2 halves) 6. Bake for 30 - 35 mins at 325 F or until a toothpick inserted in the center of the cake comes out clean. 7. Cool the cake on a cooling rack. Notes: 1. Here I baked all the 3 cakes together. You can do it separately according to your oven size. 2. Since I didn't have 4 equal size pan, I made a chocolate cake in one pan and cut it into 2 equal layers using a big knife or cake cutter. You can use 4 equal size pan or 2 pans and cut the cakes each into equal half's, all this depends on your convenience. We need 4 equal layers. Frosting for sandwiching the cakes Here I used 2 kinds of frosting of sandwiching the cakes. You can just use one type, it's all up to your preference/occasion. I made 1 cup of each frosting. If you are making just one frosting (only one type of frosting) just make 2 cups of the same frosting. 1. Chocolate cream Servers - 2 cup (We just need 1 cup) 1. Heavy Cream - 1 cup 2. Vanilla extract - 1 tsp 3. White Sugar - 2 1/2 tbsp 4. Unsweetened Cocoa powder - 2 1/2 tbsp Method 1. In an electric stand mixer or hand mixer. 2. Mix everything together in a bowl. 3. Whip until stiff peaks are formed. 4. Use immediately or refrigerate until it's time to use. 2. White chocolate cream Serves - 1 cup 1. White chocolate - 2 ounce 2. Heavy cream - 2 tbsp plus 1/2 cup Method 1. Melt white chocolate with 2 tbsp of cream. You can melt in low a flame using a heavy bottom saucepan or double boil or microwave. 2. Remove from heat mix until it is melted completely. (About 10 mins). 3. Beat remaining 1/2 cup cream until soft peaks. 4. Mix in the melted and cooled chocolate into the cream and mix until stiff peaks are formed. 5. Use immediately or refrigerate until it's time to use. Mirror Glaze recipes It's the same recipe for dark and white chocolate glaze. White Chocolate Glaze 1. White Chocolate - 350 gms' 2. Water - 200 gms' 3. Sugar - 300 gms'( 2 and 3/4 cups) 4. Condense Milk - 200 gms' 5. Vanilla extract - 1/2 tbsp 6. Powdered Gelatin - 19 gms' Dark Chocolate Glaze 1. Dark Chocolate - 350 gms' 2. Water - 200 gms' 3. Sugar - 300 gms'( 2 and 3/4 cups) 4. Condense Milk - 200 gms' 5. Vanilla extract - 1/2 tbsp 6. Powdered Gelatin - 19 gms' 7. Cocoa powder - 50 gms'(Optional) Method It's same for both glaze 1. Bloom gelatin in cold water. Mix well and after a few mins, it will turn into thick slurry. 2. In a heavy bottom saucepan, heat condense milk, water, sugar and cocoa powder for dark chocolate glaze (No cocoa powder when making white chocolate glaze). Bring to boil and turn off the heat. 3. To this add bloomed gelatin and vanilla extract. Mix until completely dissolved. 4. Sieve to avoid any undissolved gelatin particles. 5. Pour the hot mixture into the chocolate/white chocolate. 6. Let it sit for some time and mix until the chocolate is completely melted. 7. Using whisk/immersion blender make a smooth mixture. 8. Now allow it to cool to 90 F / 32 C. Then it is ready to pour over freeze cake. 9. This can be stored for future use also. 10. Once poured over the frozen cake it will set very fast. It will take about 15 mins to completely set and solidify Simple sugar Syrup 1. Sugar - 1 cup 2. Water - 1 cup 3. Lime Zest few (optional) Method 1. In a heavy bottom saucepan, combine sugar and water, heat until sugar is completely dissolved. Add lime zest. 2. Cool and use. Assembling 1. Cut the cake in 2 half. Just avoid this if you used separate pans. 2. Here and starting with a chocolate layer. Place one layer and soak the layer with sugar syrup, then layer it with chocolate cream frosting. 3. Now place a layer of vanilla cake. Soak with syrup and layer with white chocolate cream frosting. 4. Just repeat this until all 4 layers are stacked. Note: If you want a white chocolate glazed cake as a final product. You should cover the cake with white frosting. Here I covered dark chocolate frosting. 5. Freeze the cake completely before it is ready to be glazed. 6. Place a cake on a cooling rack which is placed on top of a sheet pan covered with parchment paper. This is done to avoid any wastage of glaze. You can pour the glaze from the parchment paper for later use. 7. Pour the glaze over the cake. Make your own patterns. 8. Rest the cake for 15 mins so that the glaze is set. 9. You can decorate using chocolate decorations. According to the occasion. 10. Enjoy!
|
|


 RSS Feed
